WASHINGTON STATE UNIVERSITY
Finance and Administration Information Systems
Uploading documents to WordPress
- If you’re not already, navigate to the Dashboard.
- Log into the WordPress system if prompted.
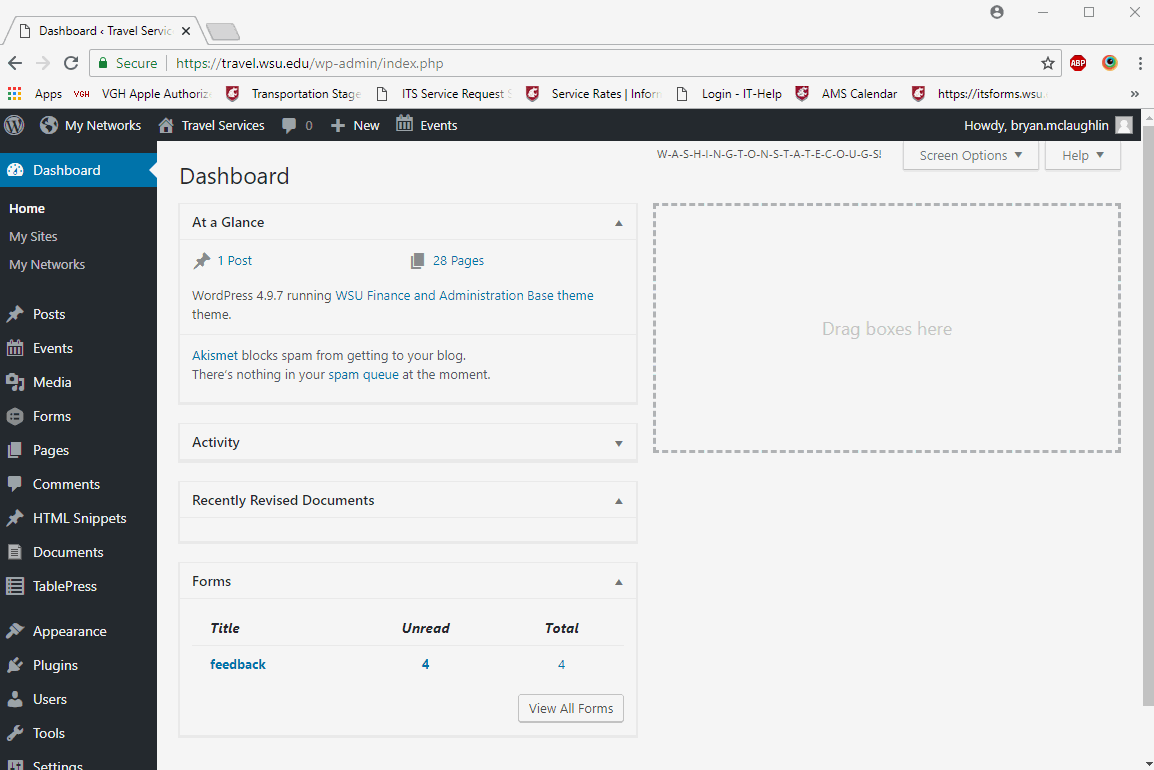
- Once on the Dashboard click the Documents link on the left hand side of the screen (see image below).
- The Document section of WordPress acts a lot like a folder, or container for individual documents.
- If Documents does not show up for you please call FAIS at 5-3247!
- For example: I can upload a document and give it a new name of “Test.” From there you can upload new versions to the “Test” document. This will be demonstrated further down the page.
- The Document section of WordPress acts a lot like a folder, or container for individual documents.
- From this window click the “Add Document” button.
- A title is added to the document being uploaded.
- Click “Upload New Document”
- The user can then search for the file they wish to upload.
- After the document has been uploaded enter a description.
- It’s a good idea to give each upload revision a descriptive title to make it easier to keep track.
- Click “Update” to finalize the upload.
Look here for more information relating to document linking
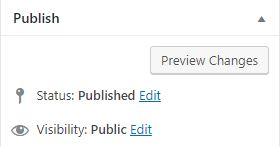
Important note:
After a document has been uploaded it will be set to “Private” visibility and will need to be changed to “Public” to be accessed.
See the second part of the upload process below!
