Getting started
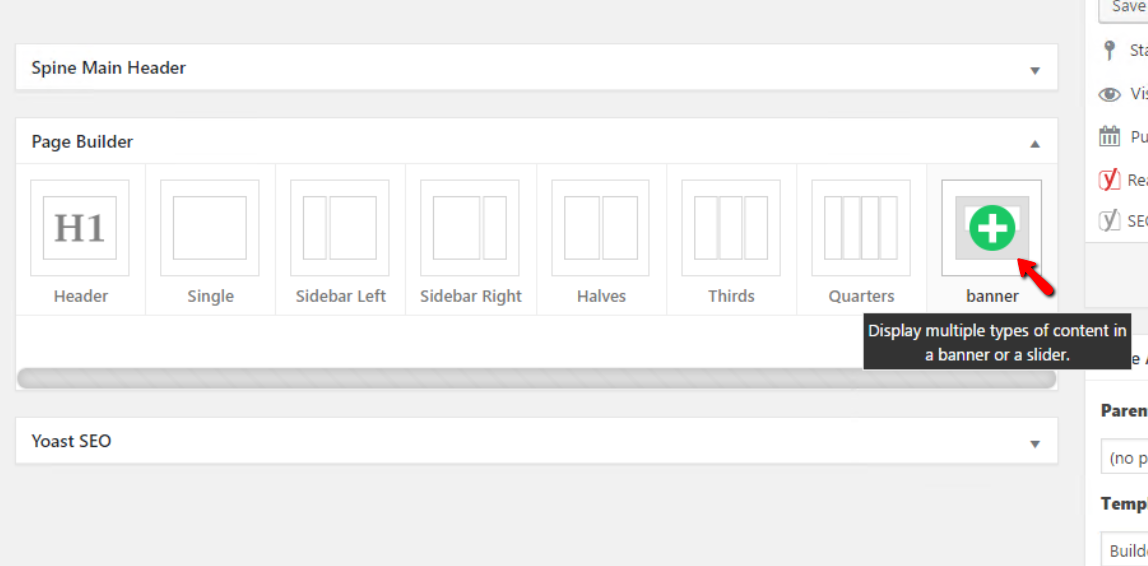
The first step is to choose the banner type from the section choices. Next you will want to addjust the settings of the banner section. You can do this by going to the bottom of the area to find the options we will work with.
Required Options for theme
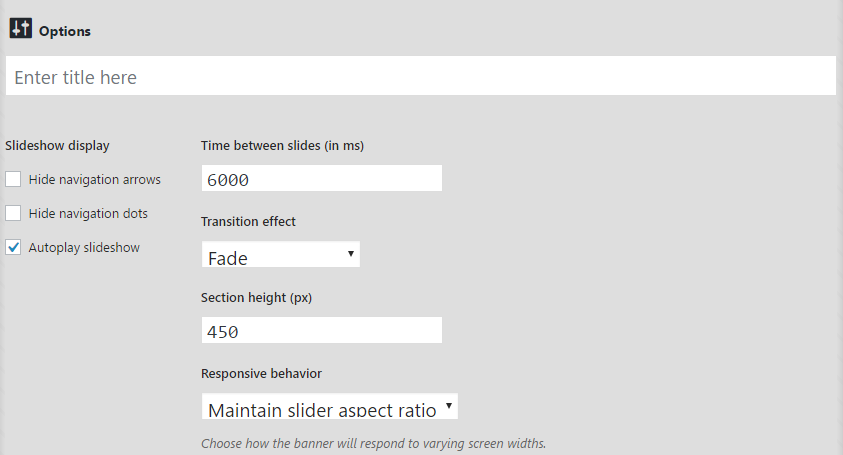
Options are broken up into 2 sections, first being the main banner options which will have the following values:
- Time between slides (in ms) : 6000
- Transition effect : Fade
- Section height (px) : 350
- Responsive behavior : Maintain slider aspect ratio
- Section Bins: Behind Content
It should look like
NOTE:
The main homepage banner should have a height of 450px while sub pages should have a banner height of 350px.
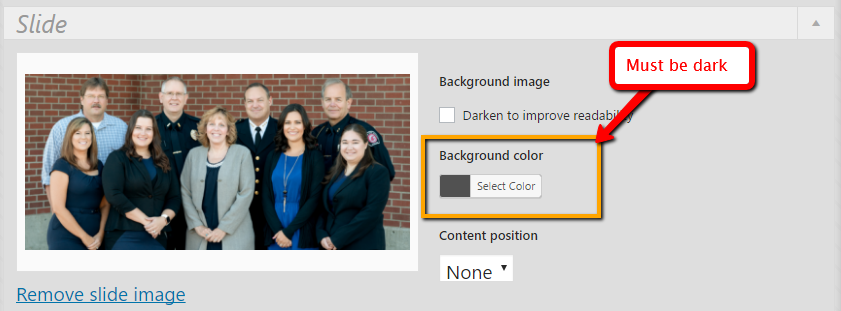
For ADA
In order to pass ADA complince checkers, all banners should set the background of the image slide to a dark color near black.
General how to
Add a Banner section
In the builder menu, hover over the Banner icon and click ![]() to add this section to your page.
to add this section to your page.
Configure the section
Click ![]() in the section header to:
in the section header to:
-
- Add a section title. This displays above the section if it is set.
- Configure the options for the slider. These include showing/hiding navigation elements, autoplay, time between slides, and the transition effect.
- Set the section height. This will be the height of the banner when the browser width is 960px. At wider or narrower widths, the height will change accordingly, depending on the option chosen for Responsive behavior.
- Set the Banner’s responsive behavior.
➝ Default will maintain its aspect ratio for browser widths between 600px and 960px. At narrower widths, each slide will expand to fit its content, while at wider widths, the height will remain static at the value set for Section height.
➝ Aspect will always maintain the same aspect ratio, regardless of the browser width or the amount of content in the slides.
- Add a HTML section ID or class.
- Check the box to remove the space below the banner section.
Configure an individual slide
Click ![]() to add a new slide. For each slide you can:
to add a new slide. For each slide you can:
- Set a background image. Click on the gray region with the image icon to upload a new image or choose one from the Media Library.
- Click
 to set individual slide options. These include the position of the content on the slide, an option to darken the background to make the content more legible, and a background color option.
 - Add content to the slide. Click
 to open the content editor. Once a slide has content, the icon will change to
.
Drag and drop to reorder individual slides
To rearrange the order of the slides, click and hold the double dotted border at the top of a slide. Drag the slide to a new location and release.
Delete an individual slide
To remove a slide, click ![]() in the corner of the slide.
in the corner of the slide.